On this page
- About this guide
- How do you choose the right space for growing cannabis?
- What size grow tent do you need for your first cannabis grow?
- Where should you order cannabis seeds for your first grow?
- What's the best grow light for your first cannabis grow?
- How do you control airflow and climate in a grow tent?
- How do you manage temperature and humidity in a grow tent?
- What grow medium should you use for cannabis?
- How should you control pH in a cannabis grow?
About this guide
This guide is based on our first-hand experience as growers, along with recommendations and opinions from the broader cannabis cultivation community. Your setup might vary depending on your goals, space, and budget, and that's perfectly fine. We built this guide to be a beginner-friendly blueprint for getting started on the right foot. At the end of this, you should know precisely what you will need for your first grow. It will not go into great detail on the steps of cannabis cultivation but instead focuses on getting set up for a simple first grow.
How do you choose the right space for growing cannabis?
Choosing a grow space is the first significant decision, and it sets the foundation for everything that follows. The size and quality of the space you choose will determine the kind of tent you can fit, the type of light you'll need, how easy it is to manage airflow, and how much time you'll spend maintaining your grow.
The more convenient your space is to access water and electricity, the easier your daily routine will be. A space with more room allows for better ventilation, better control of heat and humidity, and the ability to use higher-quality lighting.
Look for spaces like spare closets, unused bathrooms, or corners of bedrooms. Avoid extreme spaces, such as attics or garages, unless they have consistent climate control. An ideal space would be an unused room that's safe from temperature and humidity fluctuations.
Starting small is great for learning, but keep in mind that most of your gear (including lights, fans, your tent, and even humidifiers or dehumidifiers) may need to be replaced if you decide to expand later. Many growers quickly outgrow their first setup. If you know you're committed to growing long-term and have access to a larger space, it's often better to start there and grow into it.
And don't forget the value of privacy. A quiet out-of-the-way grow area helps avoid disruptions and light leaks.
Tip: If you're testing the waters to see if you enjoy growing, starting small makes sense. But if you're in it for the long run and want to save money over time, consider starting with a larger space, ideally at least a 4x4 tent. A clean, accessible space with the basics covered is all you need for a successful first grow.
What size grow tent do you need for your first cannabis grow?
Grow tents are a great way to start, though a full grow room is often the long-term goal. Tents allow you to section off part of a room and create a controlled growing environment without committing to a full build-out.
When choosing a tent size, match it to your available space and your specific goals. For example, if your room is 5x5 feet, you likely don't want a 5x5 tent. Leave enough space around the tent for storing equipment, managing airflow, and moving comfortably.
Standard beginner tent sizes include:
- 2x2 ft: ideal for one plant or small autoflowers
- 2x4 ft: efficient, space-saving option for 2 to 3 plants
- 4x4 ft: popular size with room for 4+ plants
We've personally harvested over 2.5 lbs from a 4x4 tent using proper lighting, training, and nutrients. That gives you a realistic yield goal.
We recommend Gorilla Grow Tents for their quality, optional height extension, and lightproof design. Make sure your tent fits comfortably in your space without restricting access or airflow. You will want access to all sides of the tent if you get a larger 4x4 (or anything bigger).
Where should you order cannabis seeds for your first grow?
The quick and short answer is seedsman.com, but we will be reviewing several seed banks soon. Seedsman has an excellent reputation and has been in operation for a considerable time. For a deeper breakdown of what to look for in a seed bank, read How Do You Pick the Right Cannabis Seed Bank in 2026?
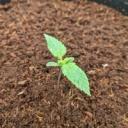
Choosing the right seeds sets the tone for your entire grow. High-quality, feminized seeds are essential if you want to maximize yield and avoid wasting time and resources. Only female plants produce buds worth harvesting, so feminized seeds help ensure that every plant in your tent is working toward that goal.
Having reliable genetics means you'll start to see consistent results as your growing skills improve. It also makes it easier to track what works and what doesn't.
Be sure to record the strains and breeders you use in your grow journal, or better yet, track everything in the BudSites app. Journaling helps you dial in your process over time and makes it easy to replicate your best grows.
Key options include:
- Feminized: all female plants, no guesswork
- Autoflowering: beginner-friendly, faster finish
- Photoperiod: more control and better yields, but needs strict light cycles
Go with stable, beginner-friendly strains from reputable seed banks. Avoid planting random seeds unless you know the genetics.
Order your seeds ahead of time. If you're ordering from an international seed bank, shipping may take several weeks or longer. It's frustrating to have your whole setup ready but still be waiting on seeds.
Legal note: Always check local laws about cannabis seed possession and cultivation before ordering. Rules vary widely depending on where you live, so see our grow laws by state guide to confirm what's allowed in your area.
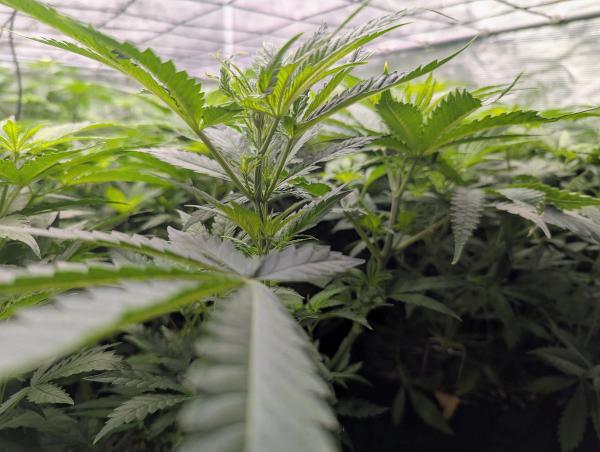
What's the best grow light for your first cannabis grow?
Lighting is where your budget should stretch the furthest. Your light has a bigger impact on plant structure and final yield than almost any other piece of equipment in your tent.
LEDs are the best option for most beginners:
- Lower heat output (critical in small tents)
- Energy efficient
- Long lifespan
- Full-spectrum options (veg + flower)
You get what you pay for when it comes to lighting. Buying cheap usually means you'll spend more later upgrading to what you should have gotten in the first place. We've all been there at BudSites.
Stick with companies that specialize in lighting. It's okay if they sell other products, too, but when it comes to grow lights, buy from a company that focuses on making great lights.
Match the light to your tent size:
- 2x2 = ~100 to 150W
- 2x4 = ~200 to 300W
- 4x4 = ~400 to 600W (we've even run 700W+ in a 4x4, but you'll need a well-ventilated room to handle the heat)
Don't trust what the box says it's equivalent to. Go by actual watts.
Suggested LED brands we use are Mars Hydro and Spider Farmer.
Look for high PPFD (photosynthetic photon flux density) and even coverage. Bar-style LED lights are a great choice because they provide uniform light distribution across the entire canopy, helping to prevent hotspots and shadowed corners, especially in larger tents like 4x4s or 5x5s. Overexposure to light can cause heat stress and light burns. You should be able to adjust the height and output of the light.
Don't forget to use a reliable light timer. Automating your light schedule (18/6 for vegetative growth, 12/12 for flowering) is essential to keeping your plants on track, especially if you're not always home. A mechanical or digital timer will suffice.
How do you control airflow and climate in a grow tent?
Good airflow prevents mold, strengthens stems, and maintains healthy temperatures.
We recommend an AC Infinity inline fan with a carbon filter for odor control. Pair it with:
- Passive intake (vent flaps or duct ports)
- Oscillating fan inside a tent to move air around
We've burned through several cheap oscillating fans, including multiple Vivosun units. Just like with lighting, it pays to invest in quality. Buy your fans from a company that specializes in airflow. AC Infinity makes both inline and oscillating fans that are durable, quiet, and reliable.
Consider adding a temperature and humidity monitor. An ideal range:
- Veg: 70 to 78°F with 55 to 65% RH
- Flower: 65 to 75°F with 45 to 55% RH
How do you manage temperature and humidity in a grow tent?
We won't go into great detail here because it's not critical when you're just getting started, but you should plan to budget for temperature and humidity gear. Nearly every grower ends up purchasing this equipment before the end of their first grow.
The better your climate control is during flowering, the better your results will be. Dense buds and healthy plants depend on stable conditions.
If you're using extremely high-powered lights in a small space with little to no ventilation, you'll almost certainly need to exhaust hot air out of the room to avoid heat buildup and plant stress.
Temperature and humidity control are critical to growing healthy cannabis plants. These two factors influence nutrient uptake, pest resistance, and bud development.
Depending on your location and grow room conditions, you might need extra help managing heat or moisture. A solid exhaust system can help regulate temperature, especially when running high-powered lights. You may also need to add a humidifier during early veg or a dehumidifier during late flower, depending on your space.
Larger rooms tend to be more stable and less prone to significant fluctuations. Small tents or closets can swing quickly between temperature and humidity extremes.
You will need equipment to control these conditions, though the exact gear depends on your room. Begin with reliable thermometers and hygrometers to monitor conditions, and be prepared to adjust as necessary.
We will be releasing more information on this topic soon.
What grow medium should you use for cannabis?
Coco coir is a great grow medium for beginners and experienced growers alike. It offers:
- Fast root development
- Fewer pest issues than soil
- More control over nutrients and pH
Coco is considered a hydroponic medium, so you'll need to treat feeding more like hydro than soil. Pair coco with fabric pots to air-prune roots and improve drainage. Recommended sizes:
- 3-gallon for autoflowers
- 5-gallon for photoperiod plants
Start with pre-buffered coco or mix with perlite (70/30) for better aeration.
Watch for our upcoming guide on feeding practices and nutrient strategies specific to growing in coco.
How should you control pH in a cannabis grow?
Cannabis absorbs nutrients best within a specific pH range. For coco:
- Aim for 5.8 to 6.2 pH
A quality pH pen (like Apera or Bluelab) is a must-have. Test and adjust your water and nutrient mix before every feeding. Calibrate regularly and store correctly.
Bad pH = nutrient lockout, even if you're feeding the right stuff.
What final steps should you take before starting your grow?
Before planting:
Perform a dry run. Test your fan, light timer, and temperature settings for 24 to 48 hours.
Set your light schedule:
- 18/6 for veg (18 hours on, 6 off)
- 12/12 for flower
Track everything in a grow journal:
- Dates, photos, nutrients used
- pH levels
- Training methods
Before you plant your first seed, take a few minutes to read through the 13 mistakes that ruin a first cannabis grow and how to avoid them. Even growers who buy the right gear and follow a solid setup guide tend to make the same early errors, whether that's overwatering, ignoring pH drift, or running their lights too close to young plants. Knowing what to watch for ahead of time will save you weeks of troubleshooting and keep your first harvest on track. Use the BudSites app to log everything, upload grow photos, and get AI-powered help if something goes wrong.